Showing posts with label handmade. Show all posts

Monday, 20 April 2015

Planning my summer makes...

With the summery weather starting in Hong Kong, I've been thinking a lot about the garments I would like to add to my wardrobe. I have already added some summer garments in anticipation of my Bangkok and Singapore holidays. My most recent Lilou (here) will be perfect and both of my Alders were made for this purpose too. In addition to those, I have made a 4th and much improved Sorbetto.

 You can see the neckline of it here and a little view of the fabric (sorry, no time for modelled shots). On my recent trip to Tokyo for a school trip, I decided to sneak to a fabric store in Shinjuku (Called Okadaya and it's amazing!) I picked up this stunning little Liberty print lawn fabric that is actually made in Japan. It was approximately $160 HKD for a metre and a half (what a bargain!) I added more than an inch to the length of the Sorbetto as my previous ones weren't quite long enough to look good with shorts. The making of this top is so simple, although attaching that much binding does get tedious. 

What to make next is the big question. I certainly need some knitted dresses. I've had the Colette Moneta pattern taped together for a while, but never quite settled on a fabric. I'm still on the look out. I've been looking online, but with some steep delivery charges to Hong Kong, I'm a bit reluctant to order. So if anyone knows a good website for knits, I would appreciate the knowledge! 

In addition to my 'kinda' planned Moneta, I hope to add a further Lilou (I also bought fabric for this in Japan) and another Anna dress from the rose print fabric I picked up in Sham Shui Po over Easter. I've also got another Sorbetto planned with my new improved pattern (You're going to love the fabric for this little number!) 

The last addition that I definitely want to make to my wardrobe is some sleeveless shirts. I love making my Alder's so much that I can't wait to make more shirts. However, my desire to only wear skirts/dresses with leggings underneath means that more Alder's does not make for totally comfortable summer attire. I've seen some stunning ones in Gap (super thin cottons) that would be great, so i'm now on the look out for suitable fabric. I've downloaded the Grainline Studios Archer (simple choice) as my pattern, so i'm ready to make! 

Photographs of my makes to follow soon - time for sewing and modelling needed!   

Friday, 3 April 2015

Two Alders for the price of one...


After a few busy weeks at work, which included a 9 day school trip to Japan; I have finally found time to blog! I've managed to do some selfish sewing during this time and these are the outcomes! 

After making my husband a shirt for Christmas day, i've been looking for another opportunity to make a shirt. The process and and the amount of different steps makes them really enjoyable to make. I started to shop around for a pattern I liked way back in February. I eventually settled on the Grainline Studios Alder. This shirtdress is much blogged about, so I sought lots of advice and opinions before setting off on my Alder journey. 


whilst doing my frequent browsing on fabric websites, I stumbled upon these beauties from modes4u.com. I loved the japanese origami pattern of the fabric above and the birds below really stood out. Both are lovely and summery prints on a lightweight quilting cotton, so I just had to order them! 


Tracing the pattern off and sticking together the 51 pages of this pattern were very long processes and meant that the manufacturing of my Alder's was very drawn out and done in many different sessions. I've only ever made one Grainline Studios pattern before, which was the Linden sweatshirt, so I had to check sizes carefully. I pretty much fit into the measurements provided, so I just cut a straight '12'. 

The sewing of my first Alder (the origami one) was very satisfying and mostly done in one session. I left the buttonholes, armholes and hem for another occasion. I stuck to all the details of the pattern and was pleased with the outcome. I made some small fitting adjustments to the waist as it was quite baggy, but other than that the fit is pretty good. The loose style means that it's going to be lovely to wear in the sticky Hong Kong summer. 


No sooner had I finished my first Alder, I knew I wanted to make a second. I just love doing all the different stages and I absolutely love doing topstitching (strange maybe?!) I made some changes to the pattern, including the shape of the collar stand (more rounded to allow for larger buttons) and the collar (rounded shape instead of the original points). I took approximately 2cm off the waist seam in order to match up with the fitting that I did on the original. 


As you can see, the birds really are stunning! The exaggerated grain of the fabric is also a nice addition. 

As with the original, this Alder went together like a dream. I'm so pleased that I decided to make this pattern up, because it's awesome! The outcomes will certainly be a staple of my summer wardrobe and will probably be in my suitcase for my upcoming trip to Singapore. 


I wonder how long I need to wait before making a third one? 

Tuesday, 24 February 2015

My first By Hand Anna dress...


After the success of my Emery dress, I have followed this up with my first By Hand Anna dress. This pattern is another popular one, that I have seen blogs about frequently. I would also say that this pattern is one of the most hacked patterns. I decided to make my own hacked version. I knew that I liked the shape of the top, but was unsure about the skirt style. The Anna dress comes with a panelled skirt that can be mid-length or full length with a split. I made the decision to cut the bodice out and sew it together to check the fit and then choose the skirt style afterwards. 


The top needed no fitting from the original as it fit perfectly! It's a lovely shape around the waist and the open ended darts give a soft finish on the bust. The neckline is a nice shape on me also, it sits high enough to allow me to wear necklaces with it.

I then made the decision to cut three rectangles to make the skirt. I used the full width of the fabric for the front and then cut it in half to make the back. I sewed it together before using two gathering rows to get it to fit the bodice. The fabric is a lovely spotty lightweight cotton that I bought from Moon Yue Piece Goods in Sham Shui Po. It fell into the gathers really well!   


I really love this pattern and am very pleased with my hack. It's certainly a dress that i'm going to make again. I think using different fabrics for the bodice and skirt would be a lovely look. Maybe a nice chambray for one and a stripe for the other... 

Watch this space for more Anna's, because this certainly isn't going to be the last one! 

Tuesday, 6 January 2015

Planning my Sureau...


After reviewing my gifts, prizes and pre-Christmas purchases I have decided that one of my next projects needs to be the Deer and Doe Sureau dress. I love the casual look of it and i've not yet approached a dress with a button stand before. After my sleeve issue with my festive Mortmain, this gives me another opportunity to try a sleeved dress - a toile will be in order! 

Because the dress has a slouchy look to it, I have been thinking carefully about my fabric choices. Before Christmas I picked up some lovely samples from a shop in Sham Shui Po. I had decided to look at some viscose, polyester and rayon fabrics. The shop is Tai Wah Textile Company on Wong Chuk Street. I was drawn in by their brightly coloured prints and I wasn't surprised how easy it was to find some totally delicious fabrics. 


At the moment, my number one choice is this delightful navy duck printed fabric. It's 100% rayon and has a nice weight and drape to it - potentially perfect for the Sureau! The sample price is just $33HKD per yard, which I think is a total bargain. I know I need about 2.5 yards to make the Sureau, so buying 5 yards (minimum) shouldn't be an issue. 


                                         Other samples that I picked up at the same time are this card of fun, spotty rayons. The navy of this is also very nice and could potentially make a nice Sureau, but as I have other spotty fabrics in my stash, it might be a bit inappropriate to buy this one too. This one is only $37HKD per yard, so might be a consideration for the future.                                 
                                     

I'm going to aim to order this fabric tomorrow as I am planning a visit to Sham Shui Po this weekend (school errands!). Hopefully the delightful ducks are in stock. 

Watch this space for my Sureau progress!

Monday, 5 January 2015

My prize haul...Thank you Gather!


I've gradually been gathering up my prize haul from my festive competition win. Before the Christmas break I was sent voucher codes for The Village Haberdashery (25 GBP) and Guthrie and Ghani (30 GBP). I was eager to start shopping! Knowing that I was visiting the UK over Christmas meant that I saved a bit of money on delivery, so I got plenty for my money. I decided to buy the fabric below from The Village Haberdashery. The fabric on the left is an Alison Glass handcrafted cotton fabric (available here in graphite). The fabric on the right is a hand painted effect viscose. Both fabrics are really lovely and I made sure that I got 3 metres of each so that I can make a dress from each if I so choose. I'm sure you'll agree that they are stunning?!


From Ghani and Guthrie I decided to buy patterns (see here for their extensive range). I have coveted both the Sew over it! Betty dress - a stunning little 50's style number and the By hand Anna dress - a very versatile dress that can be made short or long for a while. I love the packaging of both and it is such a treat to have a physical pattern, instead of printing a PDF. 


After picking up my lovely fabric and patterns from the UK, I returned to Hong Kong anticipating the arrival of my other prizes. After a long, jet lagged day at work, I managed to make it to the Post Office. I was super excited to open the package and reveal these beautiful Gather patterns (thank you ladies!) and also a surprise prize, which was The secrets of sewing lingerie book! I wasn't expecting this, so I was very happy. I have never approached underwear as a me made item, but now it's certainly an option. It's a beautifully put together book, with great photographs and clear instruction. I'm looking forward to getting stuck into it!


I now have a massive 'to sew' list and can't wait to get started!

Friday, 12 December 2014

My first Megan dress...


After my victory of yesterday (still very excited!), I have found time to day to share my first attempt at the Megan dress by Tilly and the Buttons. This dress is from her 'Love at first stitch' book and is a fairly straight forward make. I decided to use some lovely balloon fabric that I bought from modes4u.com to make it, so it has a celebration theme - Hence the photograph with the Christmas tree again! 

The main skills that this dress teaches you is an invisible zip fastening (which I use on most of my makes, so not a learnt skill here), inserting sleeves (quite straight forward on this dress actually) and an open ended dart (a new one on me, but very easy - just don't sew into a point). The open ended dart is designed to give a softer look to the shaping than a traditional dart. Tilly gives great guidance on doing this in her instructions, so no problems there! I decided to add lining to the bodice pieces to avoid using a facing. This worked well and was joined in at the armholes when the sleeve was added.  

In regards to the finished article, it's certainly well made. I'm please with my pattern matching, zip and sleeves - three things that can be dodgy! However, i'm not convinced that this shape of dress suits me. I managed to fit the dress at the back neck as this was gaping, so the size is correct, I think it is just the silhouette that i'm unhappy with. I think my curves are just too prominent! I certainly think that i'm more of a Lilou girl (see here) and should stick with this shape as much as possible. Next task is to do a pattern hack involving the shape of the Lilou and the sleeves of the Megan; wish me luck! 

P.S. Ignore my disgruntled face, It's just an unfortunate photograph!

Thursday, 4 December 2014

My festive Mortmain!


It's finally finished! After a great battle with the sleeves, I am pleased to show you my Christmas dress. My festive Mortmain by Gather is actually a massive triumph. The fit of the bodice is better than my previous attempts at this pattern (see here and here). Also, the fabric was a delight to work with and I'm really pleased with the combination of plain black cotton and the Riley Blake Santa fabric. I can't wait to wear it on Christmas Day!

What can I say about the sleeves... They were actually fine to put in, but seemingly I have abnormally large upper arms, which meant that they were far too tight! I had to remove them and decreased the seam allowance on the sleeve, before inserting it again. They're still a little tight, but it should be fine for the occasion. Thankfully I don't do much dancing on Christmas Day!

I'd love to see your festive outfits! 

Thursday, 27 November 2014

My Christmas make - a sneak peak...


After a busy couple of weeks at work, I've finally found time to blog! I have been sewing during this time and have been making progress on my WIP's. I may have been slightly over ambitious with the amount of garments I want to make before Christmas, I needed to make some decisions. So, I decided to prioritise my Christmas garment. 

I bought 2 metres of the Riley Bkake fabric above from modes4u.com a couple of months back and had originally planned to make a skirt with it - probably a Picnic Blanket Skirt. However, I had a bit of a change of heart. Although I like the picnic blanket skirts I have previously made, I'm not sure how they're going to cope with my expanding belly on Christmas Day! 

I didn't want to try a new pattern at this stage, so I started to consider a Mortmain by Gather. On a recent fabric shopping trip I bought some plain black cotton, which would compliment the festive fabric perfectly! This was the starting point I needed. The next decision I made was to add the sleeves to the pattern - my previous versions of this have been sleeveless. My final decision was patterned skirt, or patterned top... This is a tough one! 

Answer to follow once I'm finished! 

Tuesday, 11 November 2014

Second Picnic Blanket Skirt...


Whilst on one of my many recent trips to Sham Shui Po, I picked up this lovely little fabric. It has a woollen quality to it, which i'm guessing is acrylic and it has a random cream printed spot pattern on a lovely rich navy background. 

I made the easy decision to make a second Picnic Blanket Skirt. My first one was a very simple make, with a very effective outcome. This no pattern make by Tilly and the Buttons involves some simple measurements and only a few simple stages of manufacture - seam, placket, gather, waistband, buttonholes, buttons and finally hem. (See instructions here) This time I went with a dark wood button, which compliments the navy very well. 

As you can see, the fabric does crease when it's worn, but I think that this blends in with the overall aesthetic quite well. This skirt sits lower in the waist than the first one, which should suit lots of my existing tops. 

My next question is, do I make another Picnic Blanket Skirt, this time in Christmas fabric? 

Monday, 10 November 2014

A second Lilou dress...


After saying I was taking a break from Tilly and the Buttons makes, I was at a loose end, so I decided to create a second Lilou! The first one turned out ok, however I did need to take it in at the back, so I chose to make a few alterations to the pattern this time. I took 2.5cm off the centre back seam and also took 1cm off the front waist dart to improve the overall shape and fit. I also decided to move the straps over 1cm towards the centre back as it was not sitting perfectly flat. 

Once I had made the changes to the pattern, the cutting and sewing process was quite quick and I managed to finish it in about 4 hours. The fully lined bodice is a delight to do now that I have experience. I chose a white cotton lining as I figured that a self lining might show through. 

Overall, I am really pleased with the final garment. The fit is loads better than Lilou number 1 and the navy and white gingham fabric matches my capsule wardrobe colours! My only issue is that the checks don't match up precisely at the back zip. However, this is just a small detail that can be solved by wearing a cardigan. To be honest I don't think the general public would notice at all, it's just me being picky!

I have several work's in progress now, so i had better pick up the pace with my making and stop getting distracted by quick and simple projects! With Christmas garments and gifts to make, it's going to be a busy few weeks!

Saturday, 1 November 2014

Chevron patterned Coco!


So I said in my previous post that I purchased some chevron patterned cotton jersey from Spotlight in Singapore. This is the make I used it for! After the success of my first Coco, I knew that I wanted to make more garments from this wardrobe building pattern. 

Chevron patterned fabric is something I have coveted for a while and have yet to find any for clothing in Hong Kong. I had considered purchasing some Riley Blake chevron fabric from modes4u.com, but it was quite pricey so I decided to wait. I'm very glad because I totally love this red, fine stripe version. It's a challenge to look at, especially with the funnel neck and cuffs! However I do enjoy the pattern it creates at the joining point. It is certainly a statement piece! 

The manufacture went smoothly and substituting a sewn neckline with the funnel neck made it even easier to sew than my first Coco (see here). I used the hemming tape that I also bought from Spotlight to help with the finishing of the hem. This made the process extremely easy and i'm sure that a novice with knitted fabric would find this very straightforward.

I'm now almost looking forward to the weather getting cooler here in Hong Kong so that I can wear all my lovely new wintery clothes! I'm off to Beijing on a course on Wednesday, so this little number might make it into my suitcase. 

Has anyone else made a statement Coco? 

Friday, 26 September 2014

Planning my pattern hacks!

I am now without a sewing table! My dining table has broken and sewing is a no go until my new sewing desk arrives on Tuesday (I know, Tuesday!!!). I'm considering getting a put up table to get me through the next few days, but this depends on whether i can find one. Japan Home Centre is my next stop!

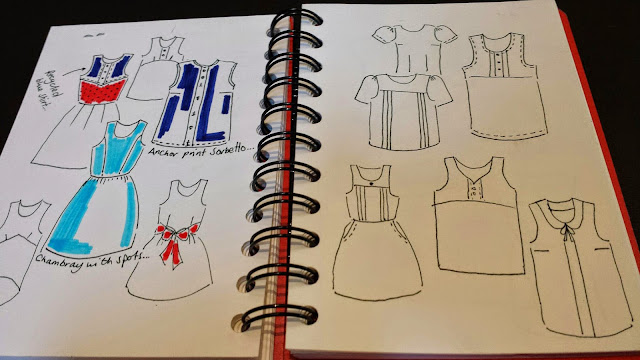
My main focus at the moment is sketching out some pattern hack ideas with some of the patterns I've used recently. Variations on The Mortmain by Gather and the Sorbetto by Colette. I'm filling my tiny little sketchbook with lots of possibilities and ideas for when i have finished my current WIP's.

Still on my table is my nautical top collection. An anchor print Sorbetto and a boat print Mathilde. I can't wait to get going on them, but I suppose i'll have to make do with sketching. There are worse things...

Tuesday, 23 September 2014

Colette Sorbetto - Part 1 - Toile and Alterations


Ok, so last night I started the process of making a Colette Sorbetto (click to take you to their page). It's a very simple downloadable pattern. It was a lot quicker to stick together than The Mathilde, but that's not surprising as there are only 2 pattern pieces! After a quick stick, I took some measurements and decided on the size I was going to make. I went for a 12 (american size) as it seemed like it would make a spacious summer top, which is very necessary in Hong Kong. 

Because the top is so easy to make and doesn't require much fabric, I decided to make a toile. This seemed sensible because I don't have enough of my new fabrics in case anything goes wrong. I decided to use some lovely red poly-cotton that I had left over from a Red Riding Hood fancy dress outfit (i'll leave it at that...). After sewing the centre pleat, darts, side seams and shoulder seams, voila, I had a toile of my Sorbetto. I tried it on straight away as I was very excited that I had just made a top in about 30 minutes! 

There were a few simple alterations I noted straight away - The dart was sitting exactly on the bust point, which isn't the most flattering, so I decided to make it 1cm shorter on my paper pattern. In addition to this, there was a slight amount of bagging under the arm and although this should be a fairly baggy top, it just wasn't right. I knew that adding bias binding to finish the top would enhance this. I decided to measure in 0.5cm from the armhole and remove a small triangle from the pattern. Hopefully this will solve the problem. Lastly, the whole thing was just too short. I have this whole long body thing going on, so I wasn't surprised. I decided to add 6cm to the length. I went for this much just in case. I can after all just cut some off if it is too long. 

I altered my pattern and am now ready to make my first real Sorbetto. I've decided on another nautical print, but before I can get started I need to do some shopping today. 

On my list I have...

  • Red, white and matching machine thread to my fabrics. 
  • White and navy bias binding (if possible). 
  • 7 x 15mm buttons for my Mathilde.
  • Some white invisible zips.
  • A new pot of pins.
  • A Bias binding maker. 
I am going to try Pottinger Street in Central for most of these goodies, I now that I can get most of what I need there. I will then go to Tailoring and Alteration in Causeway Bay to check out their bias binding makers. 

Fingers crossed that this is a quick process and I can get home to sew!

Thursday, 18 September 2014

Mathilde - Progress...


I managed to keep to my planning and stuck together my pattern last night. It says in the instructions that this process should take 20 minutes, but I think I must be particularly slow at this because it took me more than 30! Oh well, we've all got our strengths...

I then cut it out to my size. I like that the sizes are number 1-8 and not in sizes because when is a 14 ever the same as another 14! This process was thankfully much quicker (clearly I have strengths in cutting out paper!).

Ok, so next stage is sort out the fabric. I'm going away this weekend, so no sewing for me :( I have a package of fabric from www.modes4u.com waiting at the Post Office, so hopefully i'll be able to collect it tonight and wash my fabric ready for cutting. I've chosen this particular fabric for my Mathilde... 
I just need to find the perfect buttons to accompany it. I'm anticipating that my next sewing opportunity will be on Monday at the earliest, so Mathilde will have to wait until then. 

Wednesday, 17 September 2014

New make - Mathilde by Tilly and the buttons...

After the enjoyable hours that I have spent making dresses over the past few days, I have decided to turn my attentions to a different garment for my next make. It was whilst reading blogs like Tilly's (www.tillyandthebuttons.com) that inspired me to get back to blogging. It has also help to fuel my reignited passion for dressmaking. I've ordered her new book; 'Love at first stitch' which includes some lovely patterns. I am awaiting its delivery from The Book Depository, but I thought I would try one of the downloadable PDF patterns in the mean time. 

The Mathilde is such a gorgeous blouse shape and the maker gallery on Tilly's website shows lots of different ways of interpreting the pattern.I can't wait to start making! 

I've got my 26 pages of pattern printed out, ready for when I get home and can crack out the scotch tape and get sticking! Working full time means that I might get the pattern stuck together and then my size traced off before my bed is calling. 

I'll keep you up to date with my progress and give you my thoughts on the pattern. 

Tuesday, 16 September 2014

Getting Christmas ready...

What else to do on a T8 day off, but make Christmas stockings! Ok, so I had already started two stockings for the newcomers in my life, but I finally got round to finishing them. 

I chose this beautiful Red Norwegian Winter Essentials fabric by StudioE Fabrics. I bought this fabric from www.fabricrehab.co.uk, but it's available from Hong Kong based online fabric retailer www.modes4u.com. I went for wool felt for the lettering/heart shape and jumbo ric rac to bring it all together. I'm pretty pleased with the outcome. These will be winging their way across the world to the UK in time for Santa to fill them up! 


The Mortmain by Gather - The finished article!

After about 4 hours work, i've completed my stripes and spots combo dress! I really love the combination of fabrics and the waistband in the same fabric as the skirt looks great! This dress is customisable because I chose to do my box pleats this way, although the pattern suggests the opposite way. 

This pattern is so simple to make and is suitable to use with so many fabrics. I bought it from www.fabricrehab.co.uk, which is a great website if you're happy to pay international shipping. I found the price ok and it arrived quite quickly after it had been dispatched. 

I'm looking forward to showing this outfit off in Shenzhen this weekend - Bring on the karaoke!


I've styled my outfit with the Tatty Devine lollypop necklace - the perfect accompaniment! 

New project...

This is my new project. I bought the spotty fabric for a cool 25HKD in Sham Shui Po on Saturday. I already owned the nautical-tastic stripes. I think that this combination is crying out to be a new summer dress - What do you think?